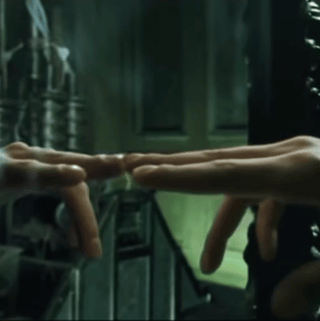
鏡に触ると波紋みたいに揺らぐ表現です。画面タッチエフェクトとして適応したらかっこよくなりそうです。
はじめに
波紋画像を作る
以下の記事を参考にCustomRenderTextureで作成していきます。

note
R16G16_SFLOAT
8bitだと精度がたりないので16bitのfloatにします。今の高さと1フレーム前の高さを格納できればいいのでRGにしています。
CustomRenderTextureの更新用シェーダー
Shader "CustomRenderTexture/Simple"
{
    Properties
    {
        _S2("PhaseVelocity^2", Range(0.0, 0.5)) = 0.2
        [PowerSlider(0.01)]
        _Atten("Attenuation", Range(0.0, 1.0)) = 0.999
        _DeltaUV("Delta UV", Float) = 3
    }

    SubShader
    {
        Lighting Off
        Blend One Zero

        CGINCLUDE

        #include "UnityCustomRenderTexture.cginc"

        ENDCG

        Pass
        {
            Name "Update"

            CGPROGRAM

            #pragma vertex CustomRenderTextureVertexShader
            #pragma fragment frag
            #pragma target 3.0

            half _S2;
            half _Atten;
            float _DeltaUV;

            float4 frag(v2f_customrendertexture IN) : COLOR
            {
                float2 uv = IN.globalTexcoord;

                float du = 1.0 / _CustomRenderTextureWidth;
                float dv = 1.0 / _CustomRenderTextureHeight;
                float3 duv = float3(du, dv, 0) * _DeltaUV;

                float2 c = tex2D(_SelfTexture2D, uv);
                float p = (2 * c.r - c.g + _S2 * (
                tex2D(_SelfTexture2D, uv - duv.zy).r +
                tex2D(_SelfTexture2D, uv + duv.zy).r +
                tex2D(_SelfTexture2D, uv - duv.xz).r +
                tex2D(_SelfTexture2D, uv + duv.xz).r - 4 * c.r)) * _Atten;

                return float4(p, c.r, 0, 0);
            }
            ENDCG
        }

        Pass
        {
            Name "Point"

            CGPROGRAM

            #pragma vertex CustomRenderTextureVertexShader
            #pragma fragment frag
            #pragma target 3.0

            float4 frag(v2f_customrendertexture IN) : COLOR
            {
                // 円を描く
                float2 pos = IN.localTexcoord  * 2 - 1;
                float a = step(length(pos), 1);
                return float4(a, a, 0, 0);
            }
            ENDCG
        }
    }
}
note
Pass
{
    Name "Update"

...

Pass
{
    Name "Point"
全体更新用のPassとマウスの位置に丸を書き込むPassを記述しています。
// 円を描く
float2 pos = IN.localTexcoord  * 2 - 1;
float a = step(length(pos), 1);
CustomRenderTextureはUpdateZoneを指定することで、画像内の特定の矩形に更新をかけられます。矩形内に円を描くための計算です。
CustomRenderTextureの更新用スクリプト
public class Main : MonoBehaviour
{
    [SerializeField]
    CustomRenderTexture m_RippleTexture;

    CustomRenderTextureUpdateZone m_UpdateZoneForUpdate;

    CustomRenderTextureUpdateZone m_UpdateZoneForPoint;

    void Start()
    {
        // 全体更新用の更新用のゾーン
        m_UpdateZoneForUpdate = new CustomRenderTextureUpdateZone();
        m_UpdateZoneForUpdate.needSwap = true;
        m_UpdateZoneForUpdate.passIndex = 0;
        m_UpdateZoneForUpdate.rotation = 0f;
        m_UpdateZoneForUpdate.updateZoneCenter = new Vector2(.5f, .5f);
        m_UpdateZoneForUpdate.updateZoneSize = new Vector2(1f, 1f);

        // マウスの位置を書き込む用のゾーン
        m_UpdateZoneForPoint = new CustomRenderTextureUpdateZone();
        m_UpdateZoneForPoint.needSwap = true;
        m_UpdateZoneForPoint.passIndex = 1;
        m_UpdateZoneForPoint.rotation = 0f;

        // 10x10の大きさで書き込む
        var updateZoneSize = new Vector2(10f / m_RippleTexture.width, 10f / m_RippleTexture.height);
        m_UpdateZoneForPoint.updateZoneSize = updateZoneSize;
    }

    void Update()
    {
        if (Input.GetMouseButton(0))
        {
            // 座標系を合わせる
            var npos = Camera.main.ScreenToViewportPoint(Input.mousePosition);
            npos.y = 1 - npos.y;
            m_UpdateZoneForPoint.updateZoneCenter = npos;
            m_RippleTexture.SetUpdateZones(new CustomRenderTextureUpdateZone[] { m_UpdateZoneForUpdate, m_UpdateZoneForPoint });
        }
        else
        {
            m_RippleTexture.SetUpdateZones(new CustomRenderTextureUpdateZone[] { m_UpdateZoneForUpdate });
        }
        m_RippleTexture.Update();
    }
}
note
// 座標系を合わせる
var npos = Camera.main.ScreenToViewportPoint(Input.mousePosition);
npos.y = 1 - npos.y;
UpdateZoneのupdateZoneCenterやupdateZoneSizeは「ピクセル座標」か「正規化された座標」を選択できます。今回は「正規化された座標」なのでViewportPointをそのままupdateZoneCenterに使えます。座標系はいい感じに変換します。「UNITY_UV_STARTS_AT_TOP」を使った方がいいかも。
波紋画像の完成

波紋画像をポストエフェクトで画面に反映にする
ポストエフェクト用スクリプト
[RequireComponent(typeof(Camera))]
public class MyImageEffect : MonoBehaviour
{
    [SerializeField]
    Material m_Material;

    private void OnRenderImage(RenderTexture src, RenderTexture dest)
    {
        Graphics.Blit(src, dest, m_Material);
    }
}
ポストエフェクト用シェーダー
Shader "Hidden/Ripple"
{
    Properties
    {
        _MainTex ("Texture", 2D) = "white" {}
        _RippleTex ("波紋画像", 2D) = "black" {}
        _RipplePower ("強さ", Range(0, 1)) = .1
    }
    SubShader
    {
        Cull Off ZWrite Off ZTest Always

        Pass
        {
            CGPROGRAM
            #pragma vertex vert
            #pragma fragment frag

            #include "UnityCG.cginc"

            struct appdata
            {
                float4 vertex : POSITION;
                float2 uv : TEXCOORD0;
            };

            struct v2f
            {
                float2 uv : TEXCOORD0;
                float4 vertex : SV_POSITION;
            };

            v2f vert (appdata v)
            {
                v2f o;
                o.vertex = UnityObjectToClipPos(v.vertex);
                o.uv = v.uv;
                return o;
            }

            sampler2D _MainTex;
            sampler2D _RippleTex;
            float _RipplePower;

            fixed4 frag (v2f i) : SV_Target
            {
                float2 fuv = i.uv;

                float2 center = float2(.5, .5);
                float2 dir = normalize(i.uv - center);
                float2 ripple = tex2D(_RippleTex, i.uv);
                fuv += dir * ripple.r * _RipplePower;

                return tex2D(_MainTex, fuv);
            }
            ENDCG
        }
    }
}
note
float2 center = float2(.5, .5);
float2 dir = normalize(i.uv - center);
float2 ripple = tex2D(_RippleTex, i.uv);
fuv += dir * ripple.r * _RipplePower;
波紋画像には高さの情報しかありませ。奥行き(z方向)に反映させたいところですが、ポストエフェクト時点では奥行きがないのでうまく反映できませんでした。今回は画面の中心からの方向にuvをズラすことで高さを表現しました。
おわり